
![Watching a small group scrimmage, Ben Lundt, St. Louis City SC goalkeeper and founder of Lundt Pro Soccer Training, shouts words of encouragement to players on Sunday, April 26 n the Lafayette grass soccer field. “The idea behind [the event] was to bring the professional soccer players closer to the community because usually people only get to see us on TV or in the stadium. [Families] actually having the opportunity to have their kids on the field with us is the most important aspect,” Ben Lundt said.](https://lancerfeed.press/wp-content/uploads/2026/05/IMG_6823-1200x800.jpg)


![In celebration of winning his second straight state title in the 215 weight class, junior Carter Brown backflips before leaving the mat. Brown won his bout against junior Kobe Rhymes of North Kansas City High School by fall in just 41 seconds. "Carter does what Carter does. We expect [success] out of him and his goals are bigger than the state championship," coach Sam Ritchie said.](https://lancerfeed.press/wp-content/uploads/2026/03/IMG_2784-1200x800.jpg)


DIY: Henna Tatoo with Kool-Aid
March 10, 2016
While I was on spring break I noticed that a popular trend was Henna tattoos. Many girls rocked beautiful flower designs and some sorority signs on their arms and legs.
So I investigated into them and learned that henna is actually a type of plant. From this plant the creator makes henna powder which is then turned into a paste. The artist use this paste to make designs on the skin. Once the paste is dried on the skin the person will peel off the dried up paste and it will leave the design on the skin. Henna tattoos last around two weeks depending on how you take care of it.
Sounds amazing right? But when I went to go get a henna tattoo of my own I was surprised to find that the cost of one hand can get to be as high as $80 depending on the details in the design. I tried to go the cheapest route and get the simple design which still costed $30 for getting one hand done.
Now after some searching, I found a way to DIY henna tattoos without the big bucks.
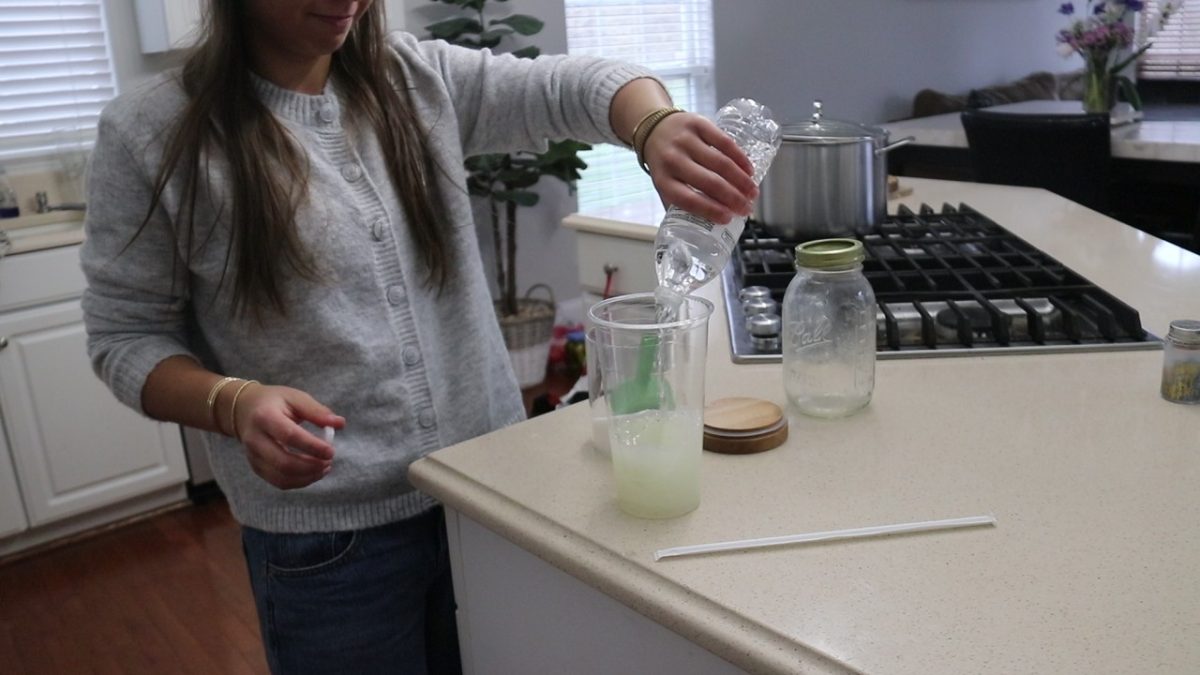
What You Need:
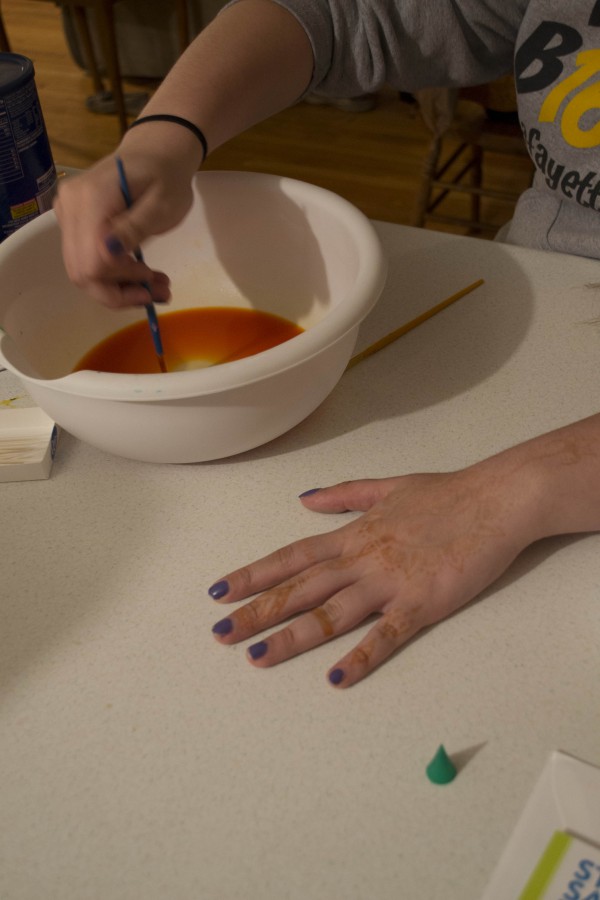
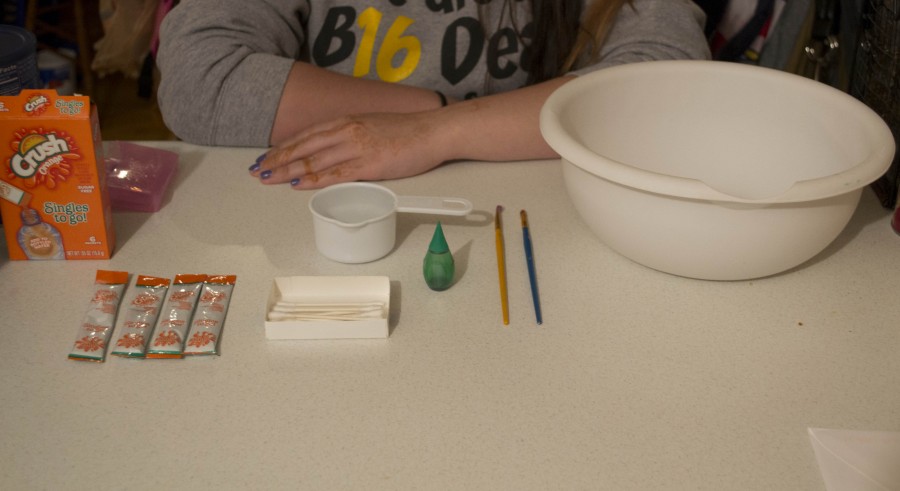
-1 Cup of Water
-Green dye (2 drops)
-Orange Kool-Aid (Because no one seemed to sell orange Kool-Aid I just used orange Crush powder which also worked)
-Q-Tips (to clean up messy lines)
-Designing tool of your choice (I just used Q-Tips and Paintbrushes)
Let’s begin!
Tips and Tricks:
-To preserve the tattoo longer put lemon juice on a q-tip and dab it on the design. The lemon juice acts as a barrier and enhances the tattoo.
-Before taking a shower rub vegetable oil on the design so that the water doesn’t affect it. Oil and water don’t mix so the water won’t ruin the design.
-Draw out the design you want before you try to put it on your skin. This gives you a clear idea of what you want making it easier to do the design on your skin.
-Try not to come in contact with water.


![Watching a small group scrimmage, Ben Lundt, St. Louis City SC goalkeeper and founder of Lundt Pro Soccer Training, shouts words of encouragement to players on Sunday, April 26 n the Lafayette grass soccer field. “The idea behind [the event] was to bring the professional soccer players closer to the community because usually people only get to see us on TV or in the stadium. [Families] actually having the opportunity to have their kids on the field with us is the most important aspect,” Ben Lundt said.](https://lancerfeed.press/wp-content/uploads/2026/05/IMG_6823-300x200.jpg)