


DIY: Charger, Chargers, Chargers
March 31, 2016
Tangled cords. Lost. Broken chargers.
It’s dreadful, no one wants to experience it. However, we have went through the broken charger or “I can’t find find my charger.”
Starting now, no one will have to go through that if they follow these simple steps. This small do it yourself (DIY) project can save you money on chargers, help to keep chargers in tip top shape and keep all of them in one area. There are only a few steps to achieve this cool project.
The things you will need for this DIY are:
- an extension cord
- old shoe box
- wallpaper, marker (anything you want to use to decorate your box)
- chargers
Step 1: CUT
You will have to cut out holes in your shoe box for however many charger you have. This will be what you put your chargers through so make sure they are big enough to fit the cord part of your charger through.
Step 2: CUT
At this step you have two options, you may either cut out the bottom of the shoe box, or you can cut a small hole in the back of it that will be the hole for your extension cord to hang out of. Either way you do not want this part to be visible so be sure to cut it out the back or the bottom.
Step 3: DESIGN
This is where you get to let your creative side soar. You can use whatever materials you would like to decorate the shoe box, just be sure to keep all of the holes uncovered. The recommended materials for this step are: markers, paint or wallpaper.
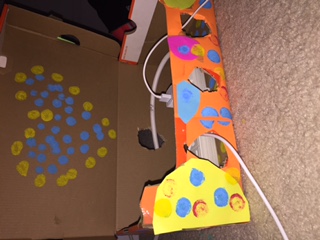
Step 4: FINAL STEPS
Put extension cord in the box, and plug it in. Finally out in the rest of your chargers and begin to use your latest creation.
Ta da, you have created a life saving charger!